 |
||
Q: How can list owners help their subscribers with some common problems? While L-Soft's technical support engineers generally devote their time helping site administrators with problems that may arise, list owners are on the frontlines when it comes to assisting their subscribers. This tech tip talks about a few common issues that subscribers often ask about and how list owners can easily help their subscribers with these questions. How to register a password for LISTSERV Anyone can register their email address on a LISTSERV server, and your password merely confirms that you are the owner of that email address. Registering allows you to interactively manage all of your email list subscriptions using the web interface. Your email address can also be assigned other privileges by the site administrator or the list owner, for example access to list archives that are only available to subscribers. To register a LISTSERV password, go to the LISTSERV "home" page, also known as the "index" page. Depending on the operating system, the URL typically looks like this:
On the right side of the index page, there is a "Get Password" link. 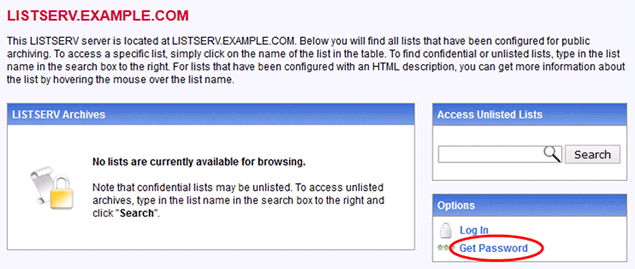 Click on this and enter the requested information. When registering an email address, be sure to use the same email address you used to subscribe to your lists. The password must be six or more characters long and may include upper- and lower-case letters, numbers and the following symbols: $#@_-?!|%. Spaces and other symbols are not allowed. If you had a password before but have since forgotten it, this new password will simply replace the old password. 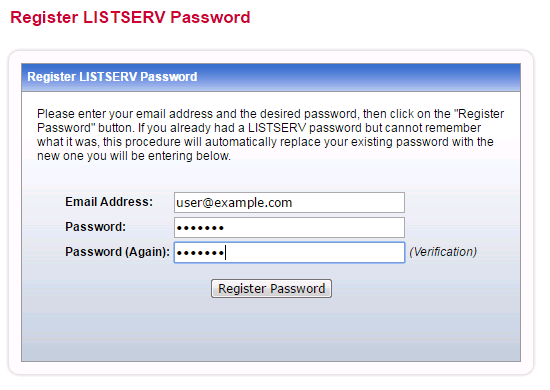 After submitting the request, LISTSERV will send you a confirmation email to verify that you are the owner of the email address that you entered. Simply click the link provided: 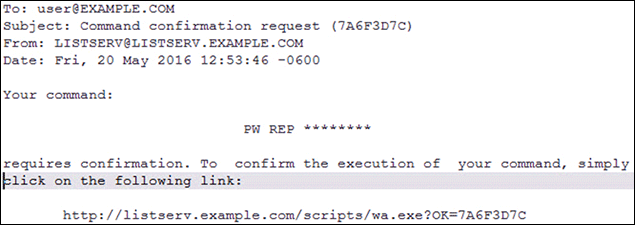 You can now log in to LISTSERV with your email address and new password. Subscribers want to get copies of their own messages When subscribers post messages to a list, many of them also want LISTSERV to send them back a copy of their message so that they know that it was successfully posted to the list. Subscribers can do this themselves by setting their subscriber options to REPRO. Simply click the "Settings" link from the Subscriber's Corner. 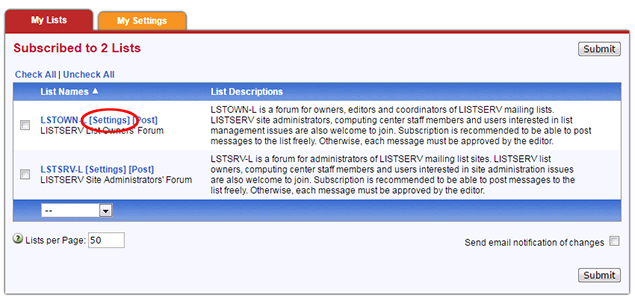 Then select the option that reads "Receive copy of own postings" on the subscriber management screen.  The list owner can also anticipate this by setting the Default-Options list configuration keyword for all new subscribers, which will be in effect when they join the list.  If the list already has subscribers and the Default-Options keyword was not set from the beginning, then the list owner also needs to set this explicitly for all existing subscribers. The easiest and quickest way is to use the LISTSERV Command interface and enter:  However, keep in mind that, depending on the subscriber's email client, this setting may not always work. Subscribers who use the Microsoft Outlook email client (usually with Microsoft Exchange) and subscribers with Gmail addresses (or subscribers whose corporate or educational mail system is hosted by Google) will not see the email sent back to them by LISTSERV because these mail systems, in an effort to prevent duplicate emails, will discard the second or sent-back copy of the email that the user sent, which is already in their outbox or sent mail box. This phenomenon has been talked about on the Gmail Help Forum. LISTSERV cannot override this behavior of these email clients, but it does offer an alternative setting for subscribers with this problem. Just select "Short message confirming receipt" on your subscriber management page, and instead of a copy of your own posting, you will receive a simple confirmation email that your message was distributed to the list.  Subscribers say that they are not getting messages from the list This complaint seems have gotten more frequent in recent times. The first thing that subscribers should check is their "spam" or "quarantine" mail folder. Sometimes list mail gets filtered to unexpected places. In this case, the fix is easy. The subscriber simply needs to adjust their own mail filtering settings. However, sometimes more complex things are happening. The first thing that a list owner needs to do is to verify whether the user is still subscribed to the list. Go to "Subscriber Management" under the "List Management" pulldown menu. Then enter the email address of the subscriber and click the "Search" button. 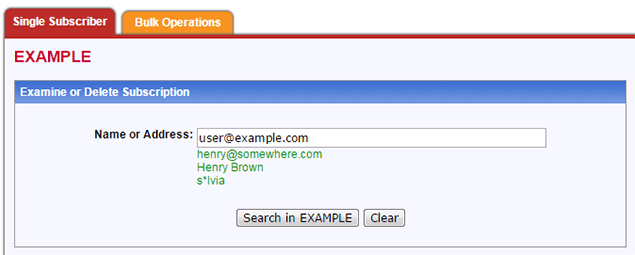 The list owner may either find that the user is still subscribed: 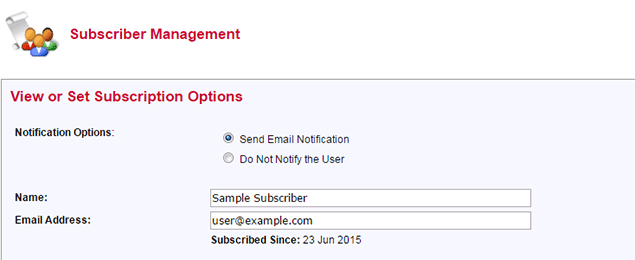 or not:  If the person is not subscribed, then the reason for non-delivery is obvious and the corrective action is to re-subscribe the person. You might also check the list-level changelog to see when and why they were unsubscribed or auto-deleted. On the other hand, if the person is subscribed, you need a way to send a test email from LISTSERV to the user. The mail path from the list owner to the subscriber is direct and does not go through LISTSERV. However, the mail test needs to occur between LISTSERV and the subscriber. 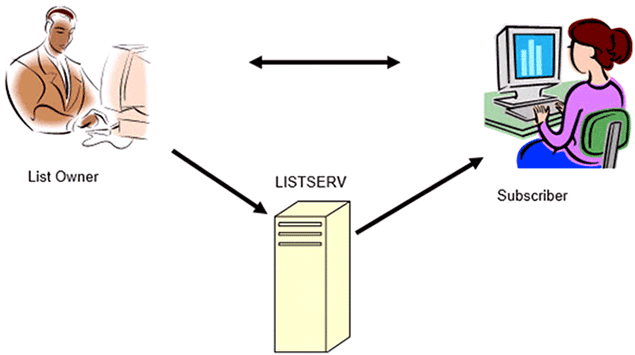 The way to be prepared for this is, first, to modify the wording of the SETINFO mail template for your list. 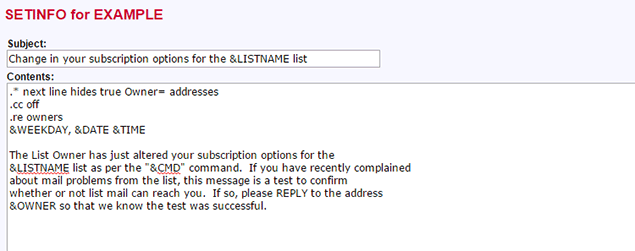 When you need to perform this test of a subscriber's email address, simply follow these two steps in quick succession. First, set the subscriber to NOMAIL and "Do Not Notify the User" on the subscriber management page.  Then immediately set the subscriber back to MAIL (uncheck the NOMAIL box) and "Send Email Notification".  This forces LISTSERV to send out the SETINFO template message to the user. You have now sent an email to test the connection from LISTSERV to the subscriber. Hopefully, the person will get the test message and respond. We hope these few tips and tricks will help you, as list owners, to provide better service and assistance to your subscribers. Subscribe to LISTSERV at Work. |
||
© L-Soft 2016. All Rights Reserved. |
|
|
