Q: How can I use LISTSERV Maestro to share and publish my messages via social media?
Answer by Ben Parker
Chief Corporate Consultant, L-Soft
Through social media integration, the impact of LISTSERV Maestro opt-in email campaigns can expand well beyond the in-box of your subscribers. This tech tip takes a look at how to use the social media sharing and publishing functions of LISTSERV Maestro to reach more people with your important content.
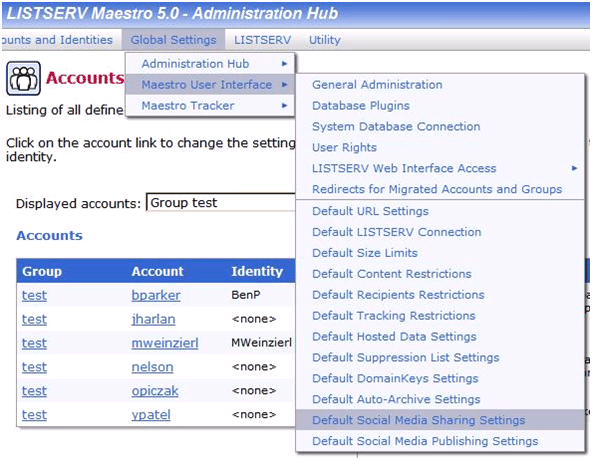
LISTSERV Maestro 5.0 has added enhancements that make it easy to integrate social media activity into your mailing jobs. Let's first take a look at social media sharing. Log in to the Maestro HUB as the 'admin' user and go to 'Default Social Media Sharing Settings'.
Click on 'Add Social Media Application' and fill in the appropriate information. You will need to find your own logo from the social media site. There are many versions of logos available so you need to choose your own.
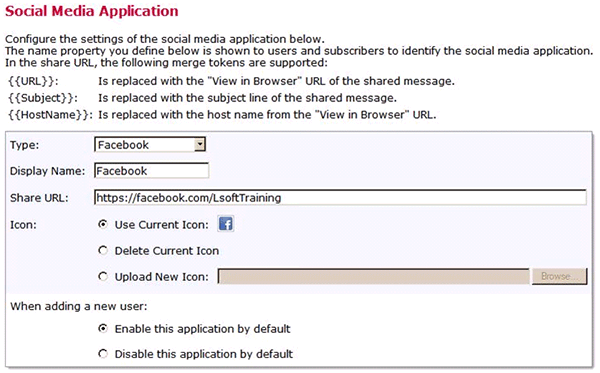
When you are done entering your social media, you will see a confirmation screen. You can always come back later to make any corrections.

Now you are ready to use these links in your mailings. When you are logged in to your regular Maestro user account, and from the workflow diagram, on the Define Message page, be sure that 'Drop-Ins' are enabled. Then simply insert the system drop-in {{*SocialMedia}} wherever you want your sharing links to appear:

Note that all your social media links that you entered in the HUB are shared in the drop-in and in the order that you registered them. If you want to adjust the order you may need to delete/re-add the links in a different order.
Now let's take a look at social media publishing. First of all, if you don't already have one, you need to create an account on Twitter, Facebook, and any other social media sites that you intend to use. That registration process is not covered here. See your chosen social media sites for details. For this case we will look only at Twitter. Our Twitter and Facebook accounts are cross-linked so that posts to Twitter are echoed to our Facebook page and timeline. This cross-link is also not covered here but is easily handled on your Twitter account profile settings page.
Next you need to register your LISTSERV Maestro instance as an 'app' in Twitter so that Maestro can post tweets on your behalf. Go to https://dev.twitter.com. Sign in with your Twitter account ID and password. Click on 'Create an app' link. Fill out the appropriate information. Read the 'Rules of the Road' agreement and click to agree.
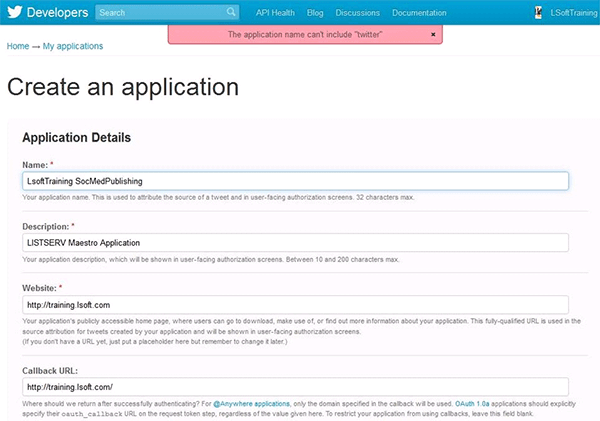
Click on the 'Settings' tab. Switch the 'Application Type' to 'Read and Write' (necessary to allow Maestro to write to Twitter). It is a good idea to add your Organization Name and Website, but this is not required. Save Changes.
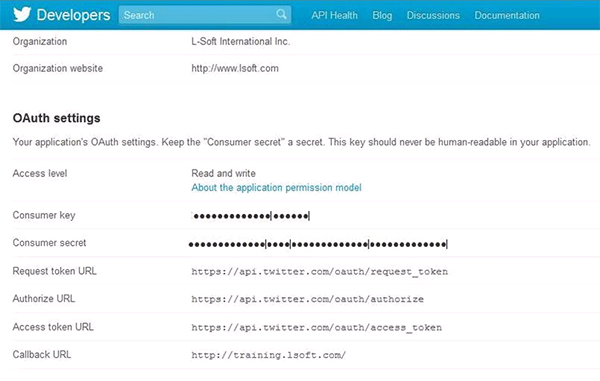
Click back to the 'Details' tab. Scroll down to 'OAuth Settings'. Make note (save in a secure place) the 'Consumer Key' and 'Consumer Secret' values. You will need to copy these to the Maestro HUB. Although obscured here for security reasons they are alpha-numeric text strings that you can easily copy and paste.
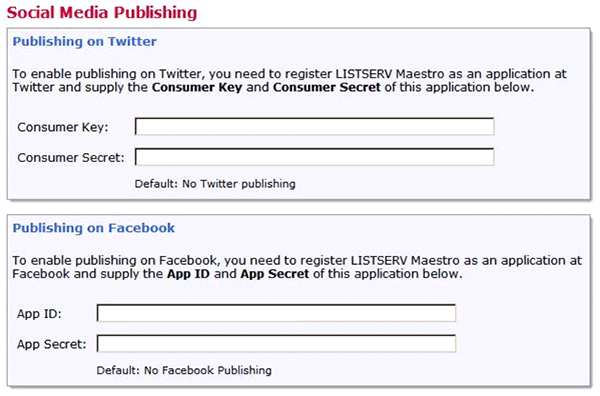
Log in again to the Maestro HUB. Go to 'Default Social Media Publishing Settings' (see first image above). There is a settings block for each social media site you previously registered in the 'Sharing' settings. For obvious reasons, you cannot publish to a social media site for which you have not first enabled sharing.
In this case, copy in the 'Consumer Key' and 'Consumer Secret' values that you saved earlier from Twitter. (We won't enter anything for Facebook at this time.) Click OK to save your settings.
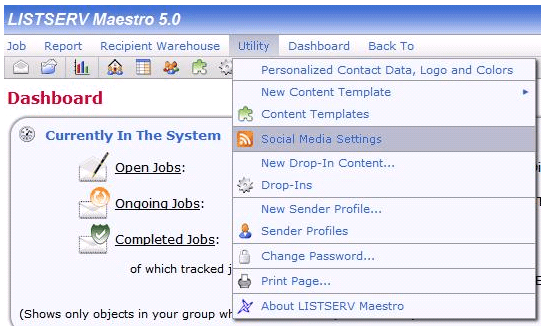
Now prepare LISTSERV Maestro for publishing. Log in with your normal Maestro user account and click 'Utility' and 'Social Media Settings':
This will take you to verify the publishing settings:
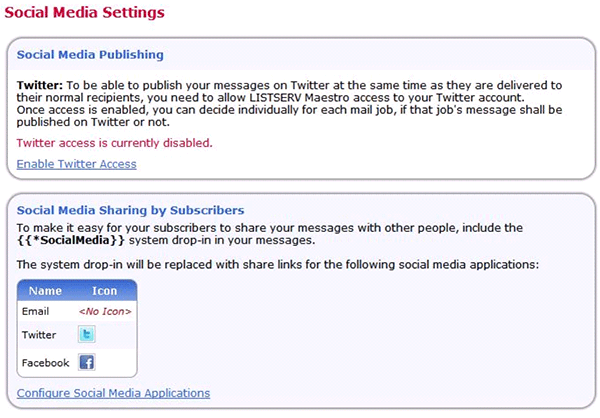
You need to enable Twitter access. Click on the link. It will take you to an account verification page. See the upper-right corner. If it shows that you are already logged in to Twitter (perhaps with a personal account) the page will simply say 'Sign In'. This means Twitter has detected a previous login cookie and will use that account. If that is not the correct account, you will first need to log out. Then the page will ask you to log in with the user ID and password that you want to use.
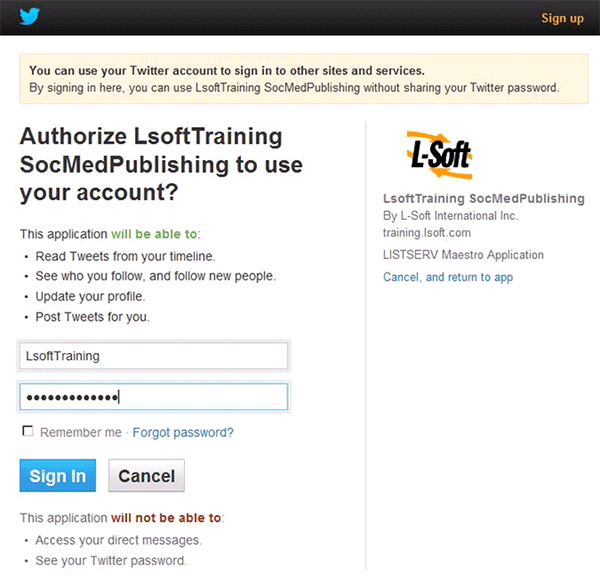
After completing this and clicking 'Sign In', you will be returned to LISTSERV Maestro.
Now you can create (or open a previous job). In the Define Message work area you will find a new Social Media tab. Click on this to enter the message that you want posted to Twitter when the job is mailed out. If you don't enter a message, nothing will be posted to Twitter, so you have per-message control.
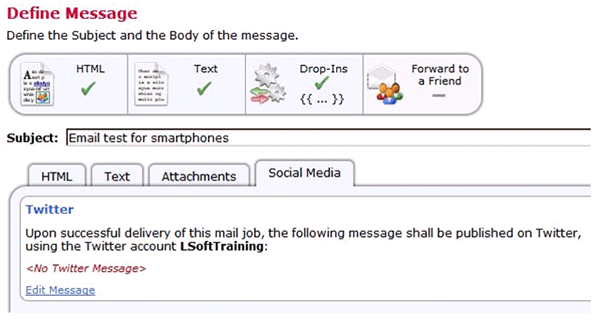
Here is an example message. Note that the special drop-in {{MessageURL}} must be included somewhere in your message text. This will be replaced with the actual URL similar to the 'ViewInBrowserURL' drop-in.

Complete the other necessary workflow steps. Tweets are not posted for delivery test messages, only when the message is actually sent out.
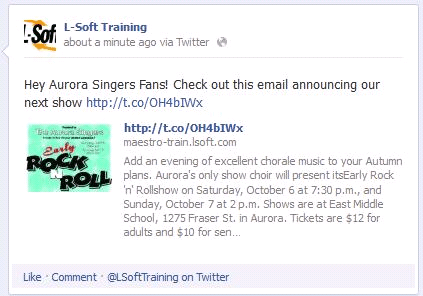
Here is the post as it appears on Twitter:

Here is the post as it appears on Facebook, forwarded from Twitter:
This brief example merely scratches the surface and demonstrates how easy it can be to set up LISTSERV Maestro for use with social media. There are many social media sites and they all work a little bit differently, but LISTSERV Maestro 5.0 encourages easy integration of your social media campaigns with your email campaigns. And since social media links are tracked like other email links, you gain additional demographic information about your audience that can be used tp improve future campaigns.
References
Social Media Integration in LISTSERV Maestro
Subscribe to LISTSERV at Work.
|