Section 1
Introduction
Section 2
The Maestro Interface
Section 3
Defining a Job
Section 4
Defining Recipients
Section 5
Defining Content
Section 6
Defining Tracking
Section 7
Sender and Delivery Options
Section 8
Outbox
Section 9
Delivered Jobs
Section 10
Reporting and Statistics
11.3 Changing User Password
Appendix A
24 Hour Clock
Appendix B
International Character Sets
Appendix C
Comma Separated Files
Appendix D
AOL Rich Text
Click the Change Password link to open the "Change Password" screen. Enter the old password first, and then type in the new password twice for confirmation. Click OK to save the new password and return to the User Settings Page.
Figure 86 Change User Password

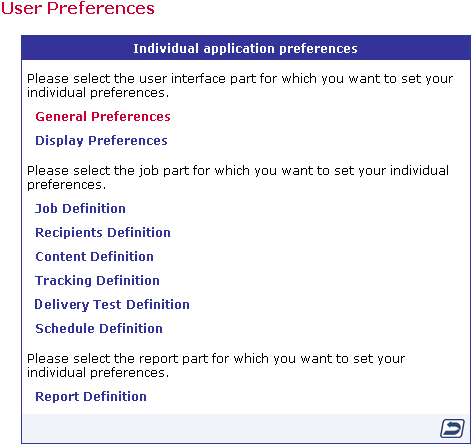
Each account can set individual application preferences by clicking the Preferences link. Preferences fall into three categories: interface preferences, job part preferences, and report definition preferences. Preferences serve as default settings for new jobs so that individual users can customize their work environment and save time. Preference settings an always be changed for individual jobs at the job level. Click on the corresponding link to set or change preferences.

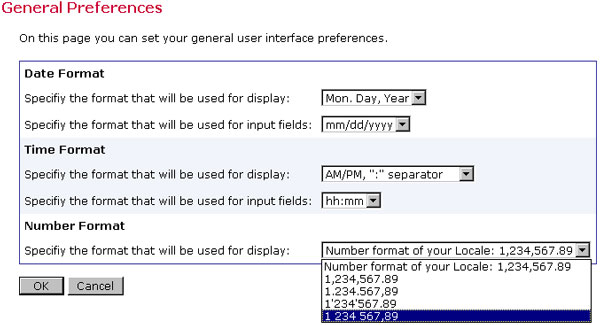
- General Preferences – Select the date, time, and number format for the user interface from the pull-down menus.

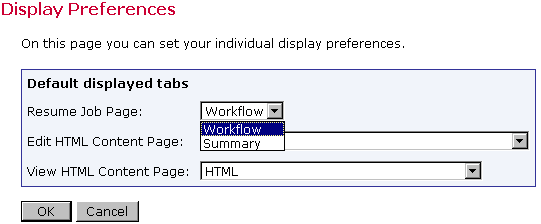
- Display Preferences – For some of the pages that have tabs to switch between active screens, select the tab that will be at the front (active) when the page is initially opened from the pull-down menus.

- Job Definition – Set the preferences for defining a new job, including the default Job ID Prefix and the default Team Collaboration settings.
- Recipients Definition – Select the default recipient type for new jobs from the pull-down menu.
- Content Definition – Select the default content type (Plain Text or HTML) and the default character set encoding from the pull-down menus. Select to have HTML messages default to having alternative text or not using the options buttons.
- Tracking Definition – Use the option buttons to select whether tracking will be on or off for new jobs.
- Delivery Test Definition – Enter a default test line for all new out going delivery tests.
- Schedule Definition – Select the default delivery type and the default time zone from the pull-down menus for new jobs.
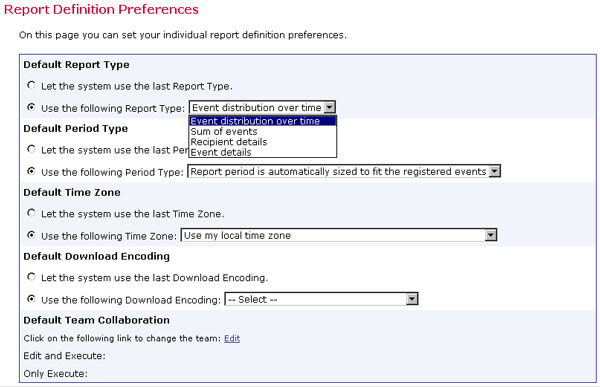
- Report Definition – Use the option buttons and pull-down menus to set a variety of default report options including Report Type, Time Period, Time Zone, Download Encoding and Team Collaboration.
Figure 90 Report Definition Preferences

After making any preference selections, click OK to save the settings or Cancel to not save the settings and return to the "User Preferences" screen.