Section 1
Introduction
Section 2
The Maestro Interface
Section 3
Defining a Job
Section 4
Defining Recipients
Section 5
Defining Content
Section 6
Defining Tracking
Section 7
Sender and Delivery Options
Section 8
Outbox
Section 9
Delivered Jobs
Section 10
Reporting and Statistics
10.1.1 Adding a Data Source Continued
10.1.2 Result Settings Continued
10.2 Executing Reports Continued
Section 11
User Settings
Appendix A
24 Hour Clock
Appendix B
International Character Sets
Appendix C
Comma Separated Files
Appendix D
AOL Rich Text
There are several ways to execute reports using LISTSERV Maestro. LISTSERV Maestro can produce "quick reports" that are instantly viewable on the screen from the Test Report tab on of the New Jobs screen (see Section 7.4 for more information) and from the Reports tab of the Delivered Jobs screen (see Section 9.2 for more information). LISTSERV Maestro can also produce reports from the Tracking Reports page as described in Section 10.
Each of the four basic types of reports, Event distribution over time, Sum of events, Recipient details, and Event details, has its own unique appearance. Each report type also has its own set of options for viewing, downloading, manipulating, and editing represented by four icons located at the bottom right side of each report. Click on an icon to access the options of each report type. The icon currently in use will have a highlighted border around it. Icons that are not available for a particular report type will appear grayed out and will not be clickable. .
|
View Report - Displays the currently selected report with the latest report options. |
|
|
Download Report - Opens the "Download Report Result" screen. From here it is possible to download report data in a zipped text file. |
|
|
Change Results Settings - Opens the "Change View Settings for Report" screen. From here it is possible to change how the results are displayed on the report. |
|
|
Edit Report / Create Report - This icon is called Create Report only if the report is a quick report. In that case, the "Define Report" screens with a new report that is pre-filled with the settings from the quick report. From here it is possible to save the quick report as a normal report by clicking the OK button, or by clicking the Save & Execute button, which will display the report again as well as save it as a normal report. For delivery tests, it is not possible to save a quick report as a regular report, so this icon is disabled (grayed out). If an existing report from the reports list is executed by clicking its title or by clicking the Save & Execute button, this icon is called Edit Report. The "Define Report" screen opens, but a new report is not created, the existing report is simply opened, the same way it is opened from the report list when the Edit link next to the report title is clicked. |
10.2.1 Event Distribution Report
An event distribution report plots the occurrence of events (open-up and/or click-through) over time. A simple line graph shows the number of responses over time. Time is plotted on the x-axis of the chart and can be measured in intervals of hours, days, or weeks. Events are charted on the y-axis and can be measured as the number of events or as a percentage of either the total number of messages sent, or the total number of unbounced messages sent.
10.2.1.1 Viewing Event Distribution Reports
The View page of an event distribution report displays the collected data in a chart format. The View page of this report type changes to reflect different options set on the "Change Result Settings" screen. Depending on what options are set, events on the y-axis can reflect the total number of events, or a percentage of either the total number of messages sent, or the total number of unbounced messages sent. Events occurring over time can be reflected as a total accumulation; each set of measured events is added to the previous set so the plotted data continuously accumulates until events stop and a plateau is reached. Or, events occurring over time can be reflected as unaccumulated numbers, plotting the data as a series of peaks and valleys. For examples of this type of report's View screen, see Figure 53 and Figure 54
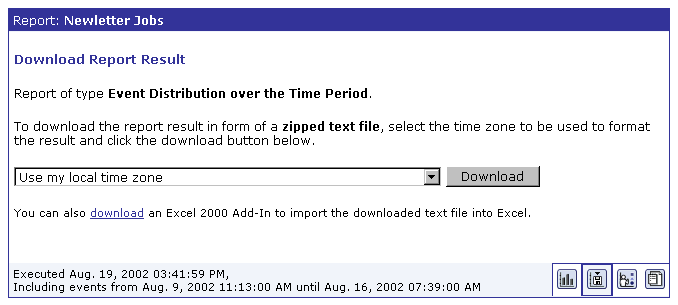
10.2.1.2 Downloading Event Distribution Report Data
It is possible to download the data from an event distribution report by clicking the Download Report icon. Data downloaded will be in the form of a zipped text file. Select the time zone that will be used to format the data from the pull down menu. Click the Download button to begin downloading the data. Click the download link to download an Excel Add-In to import the data into Excel. See Section 10.3 for more information.
Figure 67 Download Event Distribution Report
10.2.1.3 Change Result Settings
The Change Result Settings screen allows the user to change specific options and as a result change the appearance of the report on the View page and change the data that is downloaded on the Download Report page. Any changes made on the Change Result Settings screen do not change the actual report definition; they are only temporary, allowing the user to see different views and download different data. To permanently change the report, changes need to be entered on the "Result Settings" tab of the report definition page and then the changed report must be saved. See Section 10.2.1.4 for more information.
For an events distribution report the following options can be selected:
-
Result Calculation Defines how the number of events is calculated. There are three choices:
-
Total number of events The y-value of the graph will display the total number of events. For example, if 123 events have been counted for an interval, the resulting line height for that interval on the y-value will be 123.
-
Percentage of the total number of messages sent The y-value shows percentages in relation to the total number of messages sent. For example, if 300 messages were sent, and if, in an interval, 150 events have been counted, then the line height for that interval on the y-value will be 50% (because 150 is 50% of 300).
-
Percentage of the total number of unbounced messages sent The y-value shows percentages in relation to the total number of messages sent that have not been bounced. For example, if 300 messages were sent, and 50 bounced, there would be a total of 250 unbounced messages. And if, in an interval, 150 events have been counted, then the line height for that interval on the y-value will be 60% (because 150 is 60% of 250).
-
-
Interval Size Defines the size (time period) for each interval on the chart. The number of events that occur within the interval will be plotted on the chart. Intervals can be grouped hourly, daily, or weekly.
-
Result Accumulation Defines whether values plotted on the chart will display cumulatively from one interval to the next, creating an ever increasing line or bar, or whether they will display as non-cumulative intervals, creating a series of peeks and valleys.
- No accumulation Each interval's events are counted and plotted for only that time period. The resulting line on the chart displays as a series of peaks and valleys.
- Accumulate interval values Each interval's events are counted and plotted, adding to the previous interval's events until the end of the report period. The resulting line on the chart displays as ever increasing. The incline will become less steep over time until it plateaus into more or less a straight line once recipients no longer trigger events.
Click the Execute button to change the View screen (the appearance of the chart or graph), and change the downloadable data. See Figure 63 for a screen shot of this page.
10.2.1.4 Edit Report / Create Report
To change the definition of the current report, click the Edit Report icon. The Define Report screen opens if the user has the right to edit reports. The current report's General Settings, Data Sources, and Result Settings can be edited and saved to reflect any changes in the current report, or they can be saved as a new report. See Section 10.1, Figure 56, and Figure 57 for more details.
If the current report is a quick report from Delivered Jobs, clicking the Create Report icon will allow the user to create a new report based on the settings of the quick report. Type in a title for the report and then click the OK button to save the quick report as a regular report. Or, Save & Execute button to execute the report again (display it), and save the quick report as a regular report. The report title will then show up in the listing of current reports on the Tracking Reports screen. Edit the settings of this new report by clicking the Edit Report icon again. This option is not available for quick reports generated from delivery test data. See Section 9.2 Delivered Jobs Reports for more information.
This report type produces a bar graph that shows the number of recipients who clicked on each URL and/or opened up the e-mail message. This report type produces a bar graph that shows the number of recipients who clicked on each URL and/or opened up the e-mail message. For each job defined as a data source, all events of the selected type (open-up and/or click-through), and for the selected links (in the case of click-through), are summed up and displayed in the form of a colored bar.
Two types of sum can be chosen for the report, "Sum of unique events" or "Sum of all events". Sum of unique events plots only a single event of each type for each recipient. This chart will register "0" (zero) events if blind tracking has been selected for the tracking type during the tracking definition because blind tracking cannot count any event as unique. Sum of all events counts all events triggered for each recipient and is available for blind tracking.
The Sum of all events will give an overall picture of how many events were generated. When compared to the Sum of unique events, the report gives an idea of how well the overall number of events was distributed over the individual recipients. It is possible to discern whether many recipients generated relatively few events each, or whether most events were generated by only a few recipients (generating the same events over and over), while many other recipients only generated a few events (or none at all).
10.2.2.1 Viewing Sum of Events Report
The View page of a sum of events report displays the collected data in a bar graph format. The View page of this report type changes to reflect different options set on the "Change Result Settings" screen. Depending on what options are set, the number of recipients can reflect the total number of all recipients, or a percentage of the number of recipients who triggered an event. Click here for an example of a Sum of Events View screen.
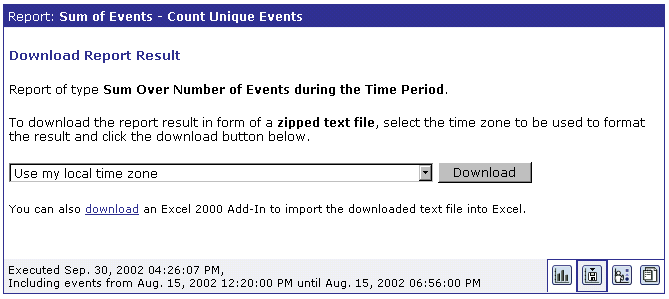
It is possible to download the data from a sum of events report by clicking the Download Report icon. Data downloaded will be in the form of a zipped text file. Select the time zone that will be used to format the data from the pull down menu. Click the Download button to begin downloading the data. Click the download link to download an Excel Add-In to import the data into Excel. See Section 10.3 for more information.
Figure 68 Download Sum of Events Report
10.2.2.3 Change Results Settings
The Change Result Settings screen allows the user to change specific options and as a result change the appearance of the report on the View page and change the data that is downloaded on the Download Report page. Any changes made on the Change Result Settings screen do not change the actual report definition; they are only temporary, allowing the user to see different views and download different data. To permanently change the report, changes need to be entered on the "Result Settings" tab of the Define Report page and then the changed report saved. See Section 10.2.2.4 for more information.
For a sum of events report the following options can be selected:
-
Result Calculation Defines how the number of events is calculated. There are three choices:
-
Total number of events Displays the total number of events. For example, if 123 events have been counted, the resulting line length will be 123.
-
Percentage of the total number of messages sent Displays percentages in relation to the total number of messages sent. For example, if 300 messages were sent, and if 150 events have been counted, then the line length will be 50% (because 150 is 50% of 300).
-
Percentage of the total number of unbounced messages sent Displays percentages in relation to the total number of messages sent that have not been bounced. For example, if 300 messages were sent, and 50 bounced, there would be a total of 250 unbounced messages. And if 150 events have been counted, then the line length will be 60% (because 150 is 60% of 250).
-
- Unique or Total Events Selects the type of events to include
in the report.
- Count only events unique for each recipient Plots only a single event of each type for each recipient. Recommended when one of the percentage result calculations has been selected. This graph will register "0" (zero) events if blind tracking has been selected for the tracking type during the tracking definition because blind tracking cannot count any event as unique.
- Count all events Plots all events triggered for each recipient and is available for blind tracking.
Click the Execute button to change the View screen (the chart or graph), and change the downloadable data. See Figure 64 for a screen shot of this page.
10.2.2.4 Edit Report / Create Report
To change the definition of the current report, click the Edit Report icon. The Define Report screen opens if the user has the right to edit reports. The current report's General Settings, Data Sources, and Result Settings can be edited and saved to reflect any changes in the current report, or they can be saved as a new report. See Section 10.1, Figure 56, and Figure 57 for more details.
If the current report is a quick report from Delivered Jobs, clicking the Create Report icon will allow the user to create a new report based on the settings of the quick report. Type in a title for the report and then click the OK butoon to save the quick report as a regular report. Or, click the Save & Execute button to execute the report again (display it) and save the quick report as a regular report. The report title will then show up in the listing of current reports on the Tracking Reports screen. Edit the settings of this new report by clicking the Edit Report icon again. This option is not available for quick reports generated from delivery test data. See Section 9.2 Delivered Jobs Reports for more information.