Q: How can I configure single sign-on via Microsoft Entra AD in LISTSERV Maestro?
By Robert Graf-Waczenski
Senior Applications Programmer, L-Soft
The ability to configure accounts in LISTSERV Maestro to use Windows Active Directory authentication has been supported for a long time. While this frees users from having to remember passwords specific to LISTSERV Maestro, it still requires them to log in to LISTSERV Maestro separately. Other applications that the user may be logged in to don't have any knowledge of the LISTSERV Maestro login session. True single sign-on, however, means that users log in only once, and then they can use multiple applications without having to log in separately.
Configuration in Microsoft Entra AD
In this tech tip, we'll use the freely available option in Microsoft Azure to create a tenant/directory for testing purposes. How to create such a directory is documented in detail here.
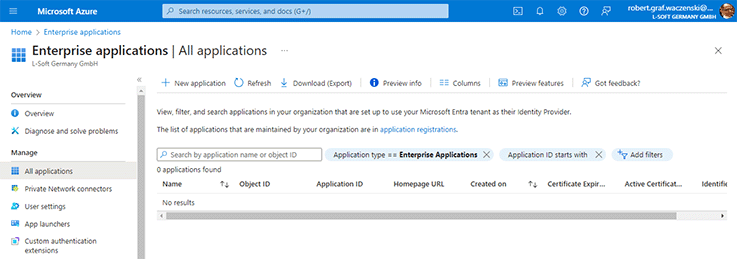
After logging in to the tenant, open the "Enterprise applications | All applications" screen:
On this screen, click on "New application". The following screen opens:
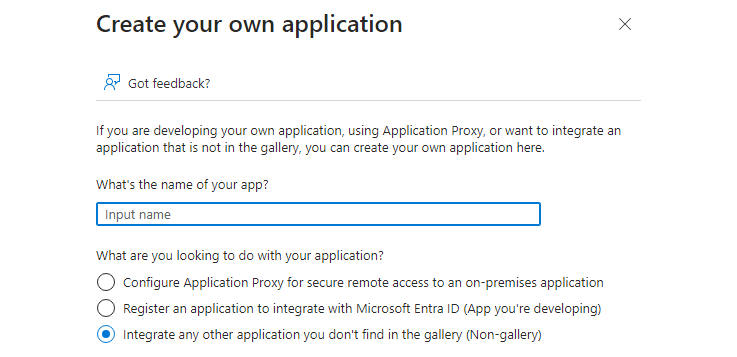
Then click on "Create your own application".
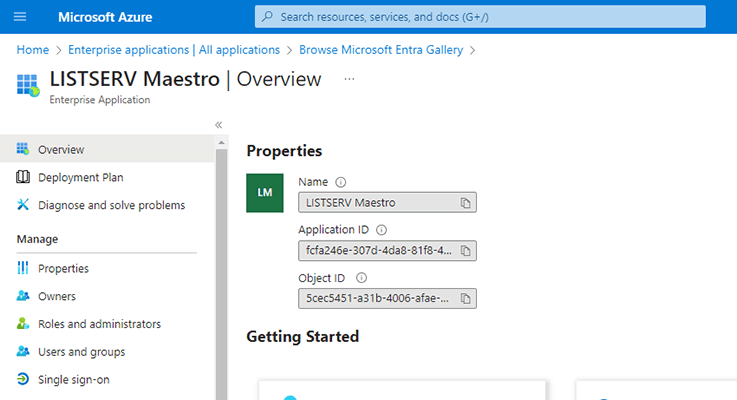
Select "Integrate any other application" and enter the desired name for your new application. In this case, we'll use "LISTSERV Maestro". After you click "Save", the following screen is shown:
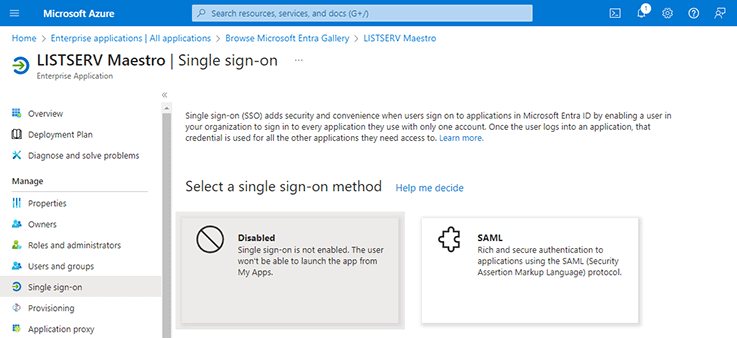
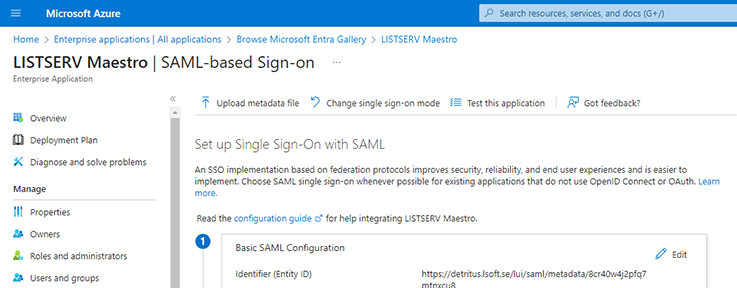
Click on "Single sign-on". The following screen opens:
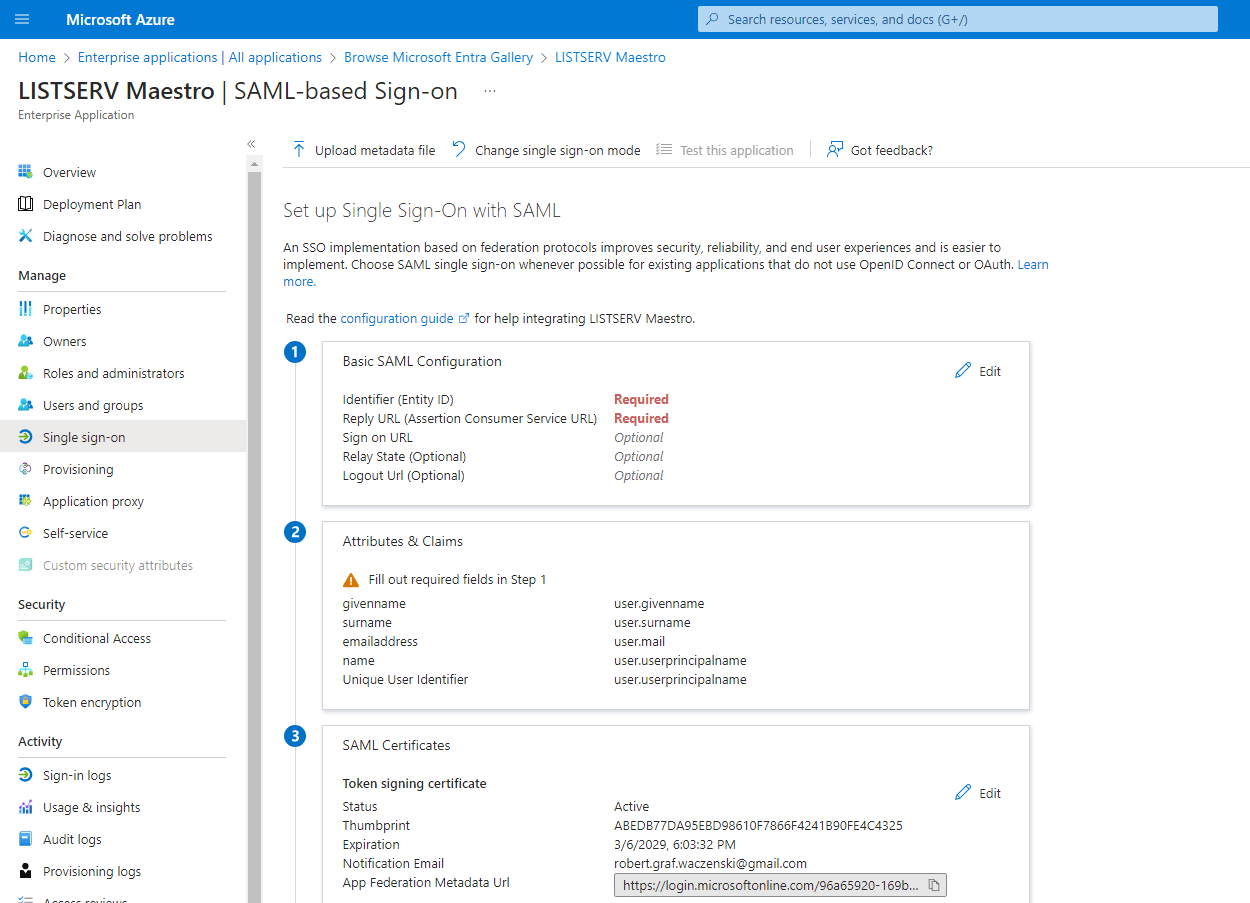
Then click on the "SAML" box. The following screen is shown:
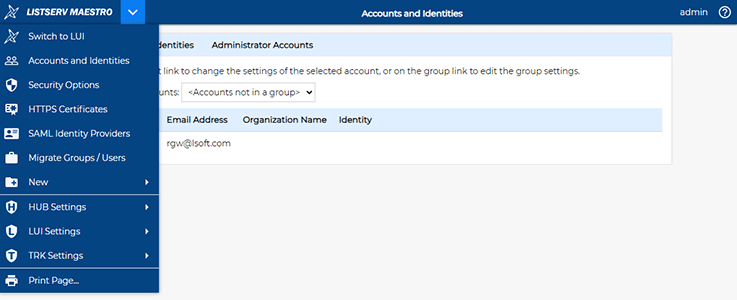
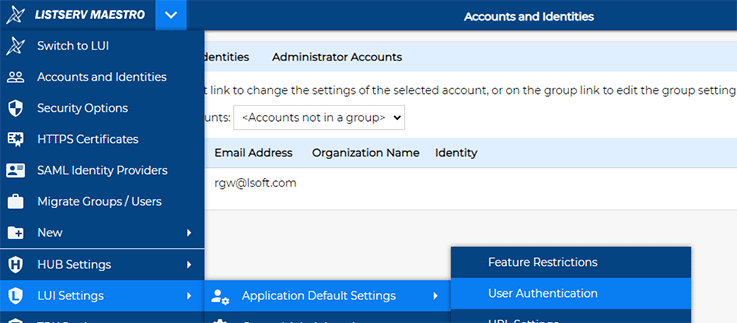
On this screen, you don't need to enter any of the custom settings. Instead, you will use the "Upload metadata file" function (on the top of the screen) later. To continue with the configuration in LISTSERV Maestro, you will need to copy the "App Federation Metadata URL" that is available for copying to the clipboard (at the bottom of the screenshot). Back in LISTSERV Maestro, you now log in as an administrator to the HUB and open the main menu, which shows a new option in LISTSERV Maestro 11.1:
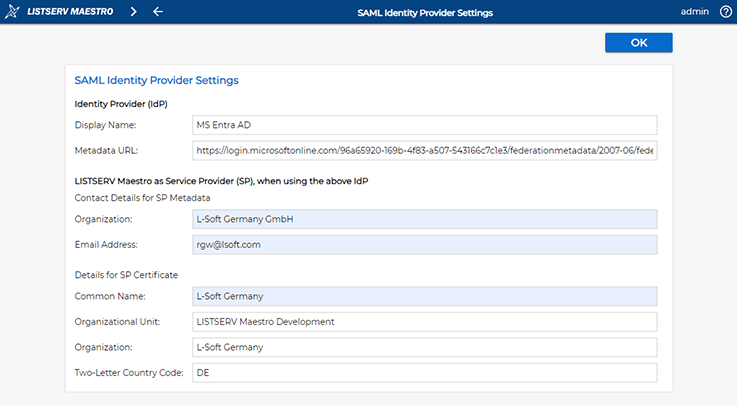
Click on "SAML Identity Providers" in the main menu. On the screen that opens, click on "New Identity Provider". This screen opens:
In the "Metadata URL" input field, paste the "App Federation Metadata URL" that you copied from the screen in MS Entra moments ago. The "Display Name" is only relevant for LISTSERV Maestro. Use anything that would distinguish this provider from any others that you may want to configure. The part underneath "LISTSERV Maestro as Service Provider (SP), when using the above IdP" identifies your LISTSERV Maestro instance in the communication with MS Entra. Click "OK" to save the settings. The screen now looks like this:
Click on the "SAML SP Metadata URL" link. This downloads an XML file to your computer. Locate this file and upload it to MS Entra, using the link on the top of this screen:
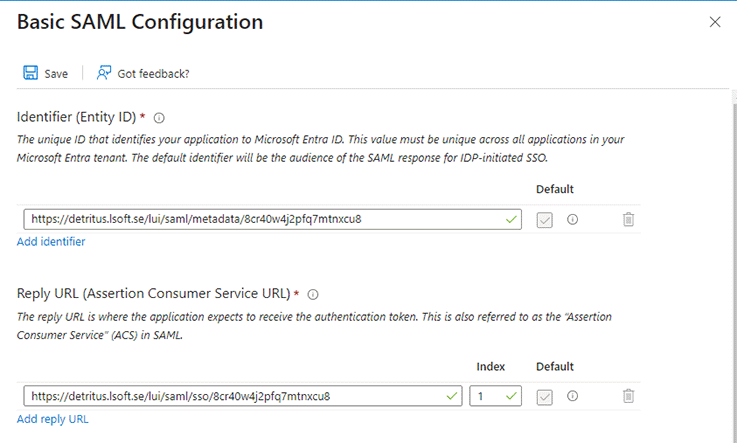
Click on the "Upload metadata file" link and select the XML file that was just downloaded to your computer. This screen is shown:
Click "Save". Now the screen looks like this:
Now click on "Users and groups". This screen opens:
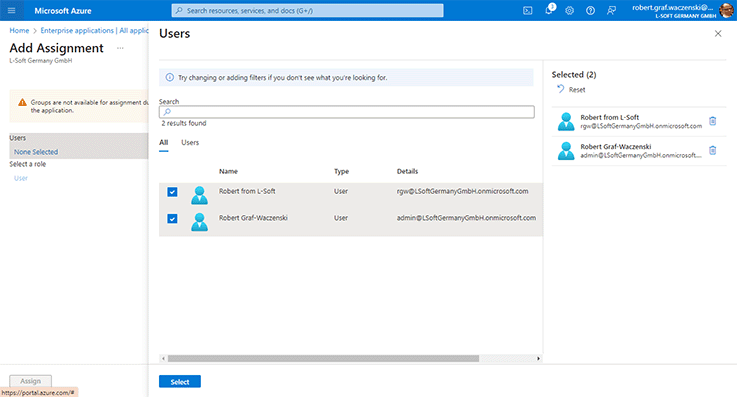
Click on "Add user/group" and select from the users that are listed in your directory:
Click "Select" to apply your selection. The selected users are now assigned to your application. Before continuing, a note about the email addresses that are shown here in MS Entra. In addition to securely associating your LISTSERV Maestro instance with the application in MS Entra, you must also associate users in your directory with users in LISTSERV Maestro. This works by way of the user's email address in MS Entra and the LISTSERV Maestro user's account address as given on the user details screen.
In LISTSERV Maestro 11.1, a new option has been added to the choices for "User Authentication". In this document, we configure SAML SSO directly on the default application level:
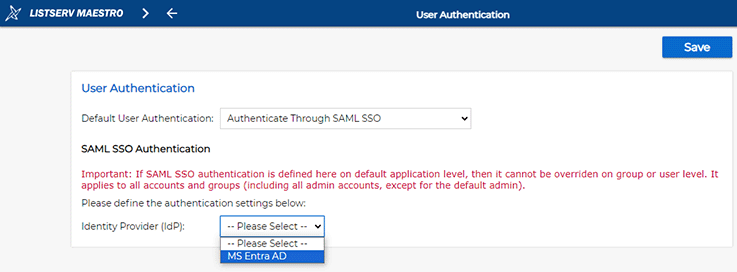
Select this option, then pick "Authenticate via SAML SSO" from the drop-down menu:
Next, select the IdP you configured earlier:
Click "Save". In your on-premises setup, the following screen may already show the correct account address:
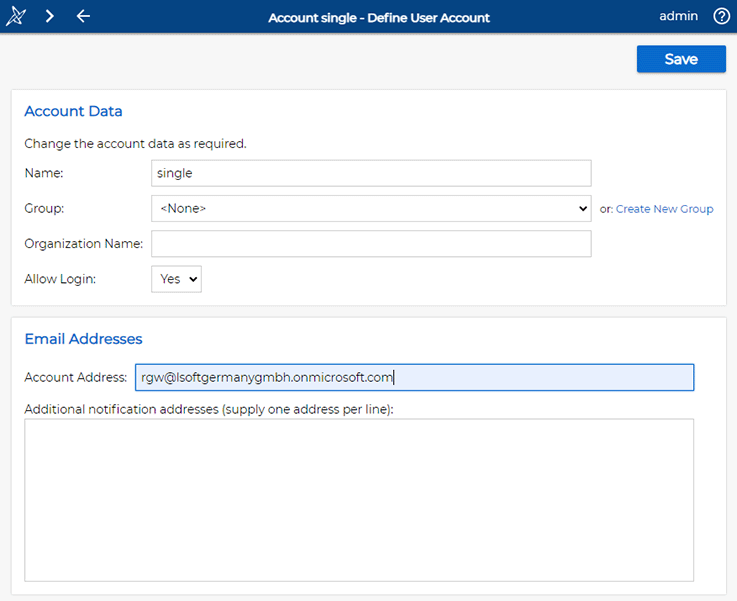
In the setup that was made for this tech tip, however, the MS Entra Directory was also created with a test account and with test users, so the addresses in MS Entra are different from the account addresses that were used before. For single sign-on with MS Entra to work for an account in LISTSERV Maestro, these addresses must match, so the previous account address for the "single" account in the test LISTSERV Maestro setup shown in the screenshot above was changed to the address that was given in MS Entra for the user "Robert from L-Soft".
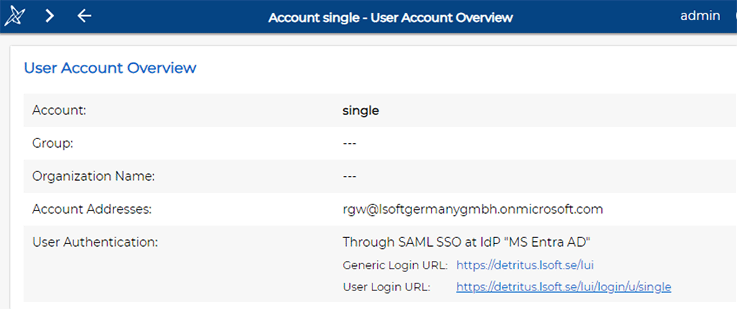
The account overview screen in LISTSERV Maestro now looks like this:
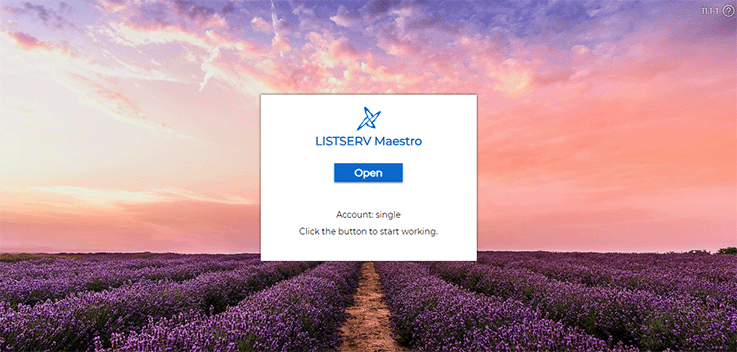
Note the user login URL shown on the screen. You can now provide this URL to the account owner. Accessing this URL shows a screen like the following:
Clicking the "Open" button now initiates single sign-on. If the user is not already logged in, the user first picks the desired account:
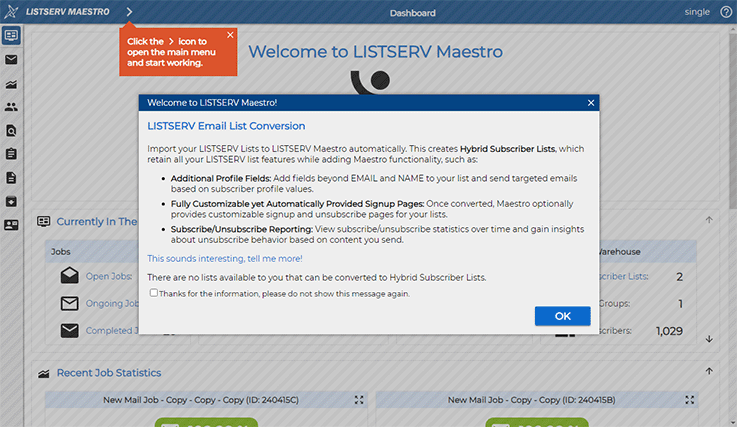
Then, after having completed the steps to sign in with this account in MS Entra (including any of the available 2FA methods like sending a code via email or authenticating through the MS Authenticator app on a mobile device), the user is now also logged in to LISTSERV Maestro:
LISTSERV Maestro 11.1 not only supports single sign-on but also single sign-out. This means that when a user with SAML SSO activated in the users's authentication settings logs out of LISTSERV Maestro, then this logout action is propagated through to MS Entra and, therefore, effectively also logs out the user from other applications that are associated with the same MS Entra directory.
Next Steps
A Quick Favor – Your Feedback Matters
Was this article helpful to you? Would you recommend it to a colleague? Your input helps us create content that truly supports your work. Thank you!
Want More Insights?
Catch up with the latest LISTSERV developments, industry best practices, expert tips, tutorials and more.
|
LISTSERV is a registered trademark licensed to L-Soft international, Inc.
See Guidelines for Proper Usage of the LISTSERV Trademark for more details.
All other trademarks, both marked and unmarked, are the property of their respective owners.


